Google authorship was introduced as another way of determining the quality of content, the more quality website you’re able to add to your resume, the higher are the chances of you appearing on search results more often.
Authorship for many is simply a way of getting their picture and name on search engine results page.
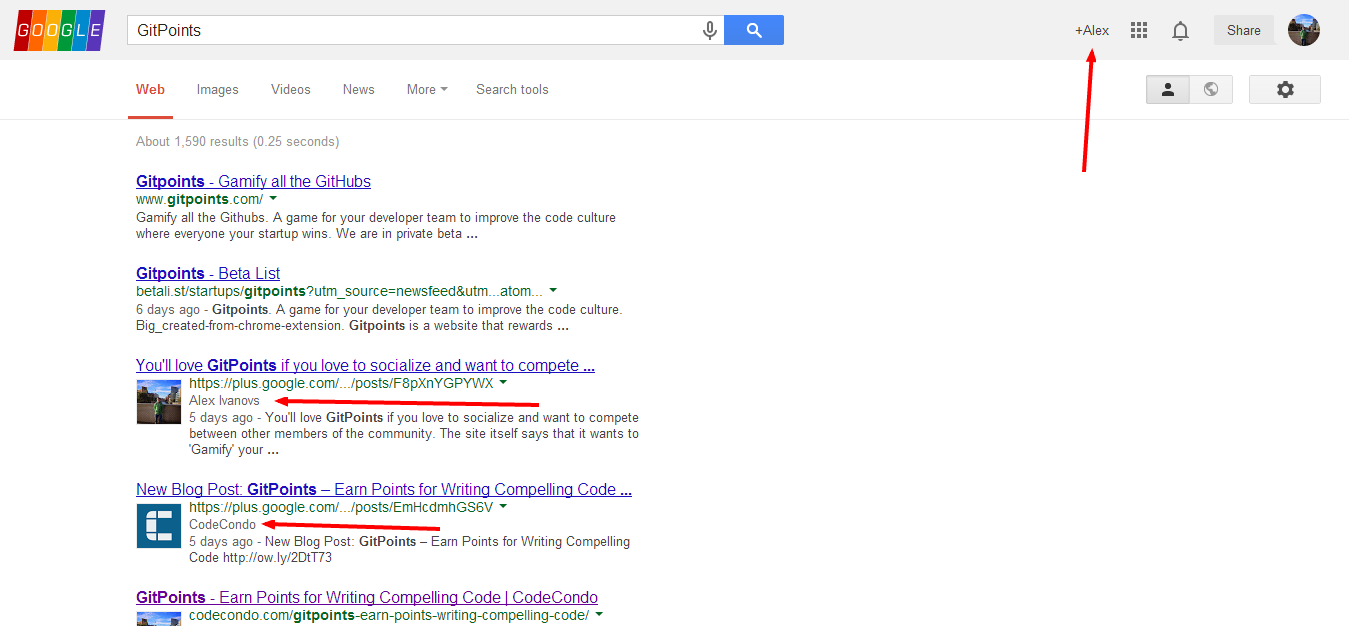
It didn’t take that long for Google to realize how much abuse is happening around the authorship feature, and in late December, 2013 – they reduced the amount of authorship results showing on the search engines results pages by 15%.
This means that there was room made for more quality submissions and writers to enter the swarm. It’s not at all difficult to create an authorship profile for yourself. You will first need to signup for Google+ and fill out your profile info. In one of the sections of your ‘About’ page you will find something similar to this:
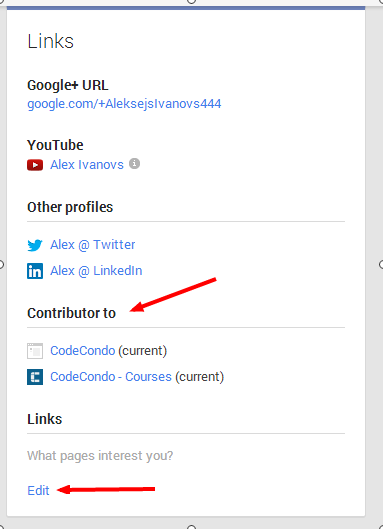
You will want to click the edit button, and add all of the websites that you write for. It’s really simple to fill out, and all you need is the title of the website you’re writing for and the URL of your author page that holds all of your writings and content.
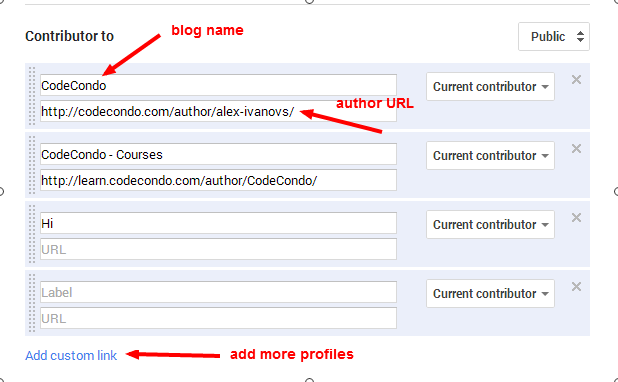
This is “almost” all that is required of you in order to show Google where you’re an author and where your content gets published to. The next part is adding a link of your Google+ profile to the blog you publish for. It can be your own, or it can be someone else’s.
Unfortunately, it’s impossible for you to add your profile URL to other blogs without having the admin of that site do it himself. The problem I’m going to solve in this post is going to be on how to have your own authorship plugins on your website. I’ll be listing probably no more than four Google+ authorship plugins, and no more than three Twitter cards plugins.
The basic guide to verifying yourself can be found here, as an official Google guide.
Why Twitter cards?
I think that as the web evolves, things like Twitter Cards are also very important and pretty much as an alternative authorship method in its own way. It shows that you care about your blog, business or brand that you are willing to go the extra mile. You can find out more about Twitter cards on Twitter Development center.
Google Authorship Plugins for WordPress
I’m open to questions and I’ll gladly help you if you run into problems, or still don’t how to add yourself as an verified author to Google’s search results.
Google Authorship
The first plugin on the list is probably as minimal and basic as it gets. You begin by installing this plugin and then heading over to your WordPress profile page where you will need to edit the Google+ URL to yours and save it. After that has been done you can head over to the widgets page and add either an ‘icon’ or a ‘badge’ as you can see in the snapshot above, I’ve shown you what the tiny badge looks like. It’s all you need to verify that you’re an owner of the blog after you’ve added it to your Google+ contribution page (see above).
Google Plus Authorship
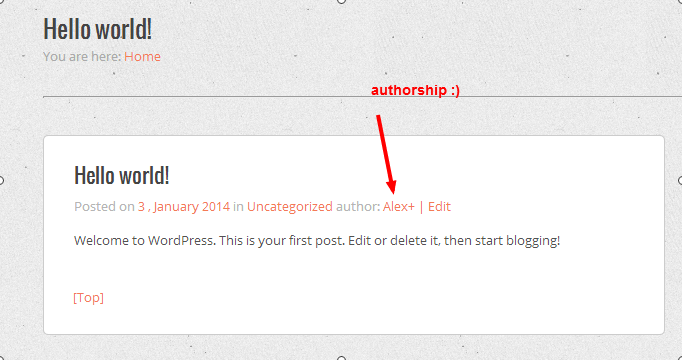
This is even more simple plugin than the one above. You only need to install it, and set the URL on your profile page to have it working. There are no widgets required of you, and no additional modifications. It will automatically embed the Google+ URL in source code – you only need to have the author page added on your Google+ About page.
Google Author Link

This is a little bit more advanced plugin, but still very easy to install and setup.
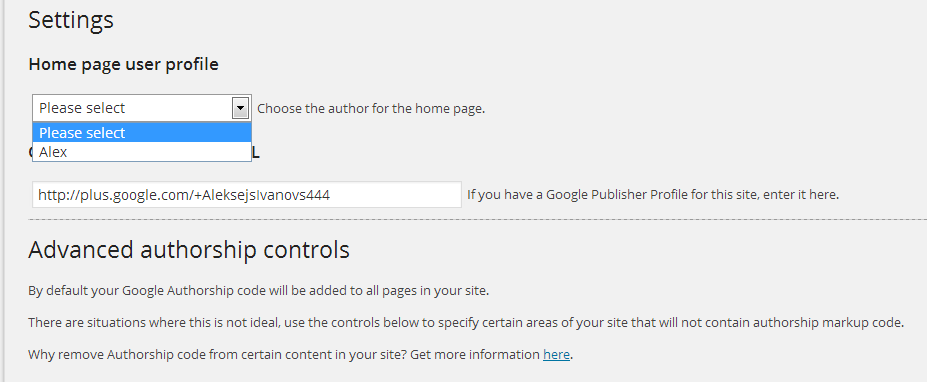
You’ll get this screen when you go to the settings page of Google Author Link. The next step is to allocate authors for each of the pages on the blog. This means that custom and specific authors can be added if you operate a blog with multiple authors. It’s a very easy to understand authorship plugin.
New Google Plus Badge Widget
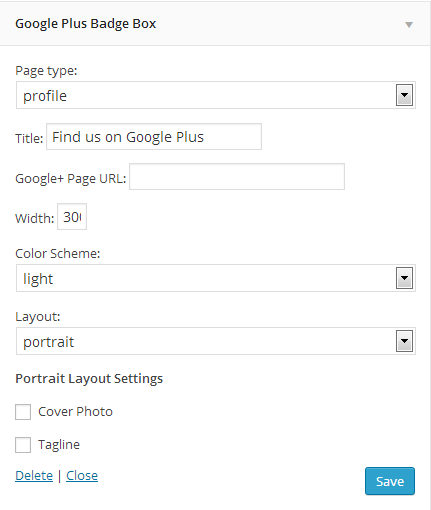
The last plugin on our list is a badge, and it works perfectly fine with telling Google that you’re the owner of the specific blog / page. You’ll be greeted with a couple of options on the widget page after installing this authorship plugin, as you can see in the snapshot above. After specifying all of the settings, you might end up seeing something like this,

Looks pretty cool eh?
Twitter Cards for WordPress
These are basically rich snippets from schema.org that can be a real pain in the *you know where* to setup manually. This is why it’s useful to have all these plugins at your disposal.
Twitter Cards
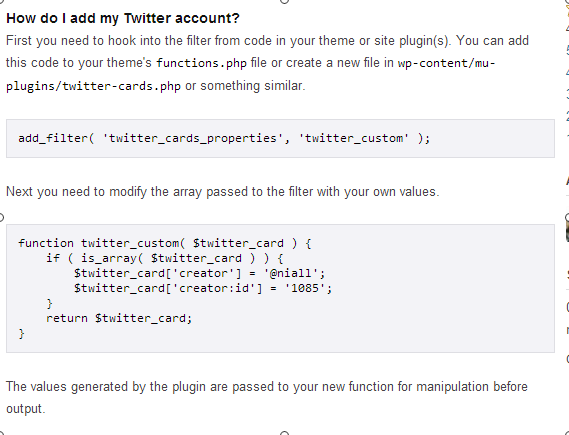
This might be a little bit hard to add for the average Joe, but it is a nice and effective plugin that will do it’s job and do it well. You only need to dive into the function files of it to add your Twitter handle and ID, later you can expect to have your tweets show up like this:

If You need a hand with it – let me know.
Twitter Cards Meta

This will be a much easier plugin to setup, at the cost of having a lot of functions that some people simply don’t like and want to avoid. I hate when my dashboard is cluttered and full of plugins, I always try to clean up every few weeks to see what hasn’t been that useful at all.
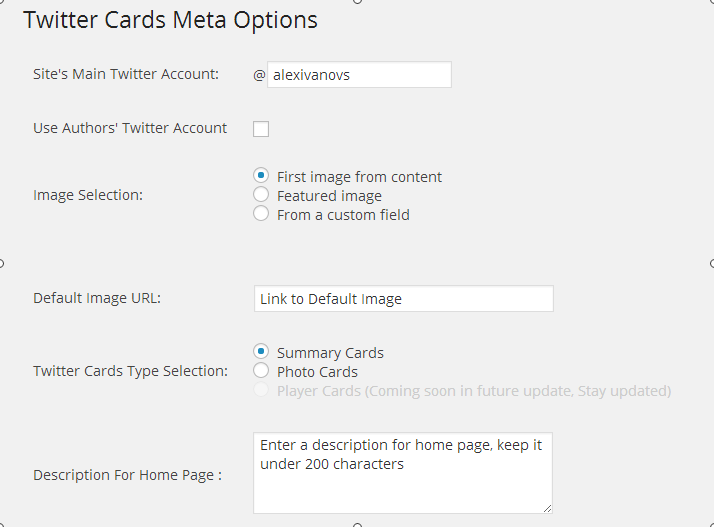
The settings page is very easy to understand and doesn’t take a lot of time to get it setup. You only need to verify the type of a Twitter card you want trough this page.
Twitter Card Generator

This is essentially another option to choose from, and doesn’t add more value that then previous two plugins have already added.
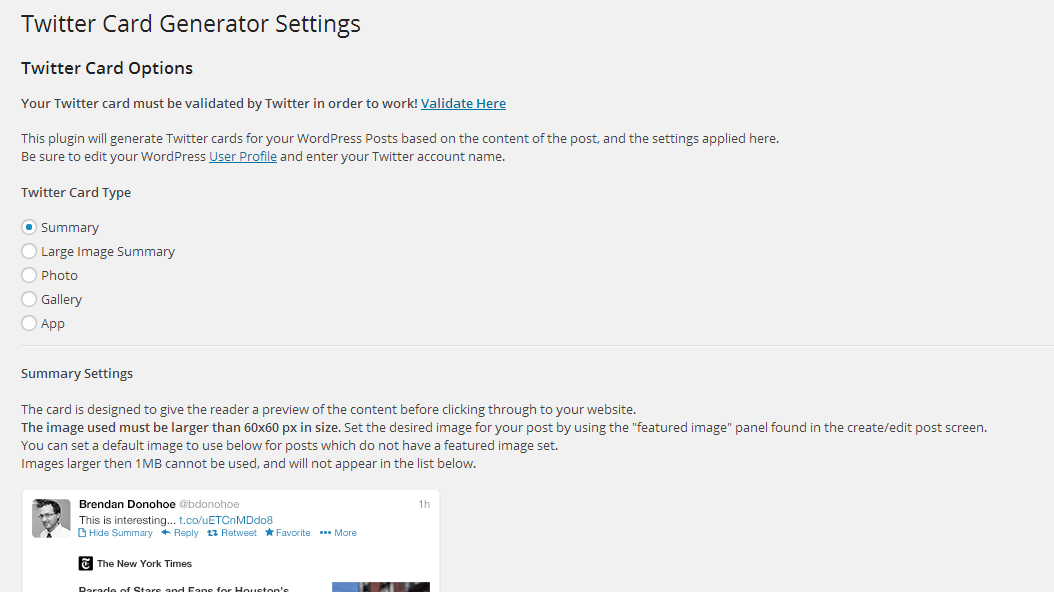
All of the settings are explained in detail and offer direct previews of the Twitter card types.
Conclusion
I think that covered pretty much everything that I wanted to achieve within this post. You should definitely gear up and get authorship for your blog, and also utilize Twitter summaries which are a great way to show that you care about what you do. It also gives users a glimpse of the first one or two sentences…sometimes that’s all you need.
[ photo: source ]


